
Over the past year, uses for agentic LLMs have started to pop up in the realm of VFX, tools that can inspect your scene contents, make modifications, and even some which purport to build scenes from scratch. But most of them have a similar architecture: MCP servers, config files, library registrations. If you need custom tools, you have to build and test code alone, and then afterward wire it into a system that can expose it to your LLM. In Virtual Production where I’d hoped to employ agents myself, you might update a tool three or four times in one day, in fact sometimes the entire life of a tool is only one or two weeks. So to me all the architectures out there look interesting, but felt a little too fragile to survive the wrath I see on a day-to-day basis.
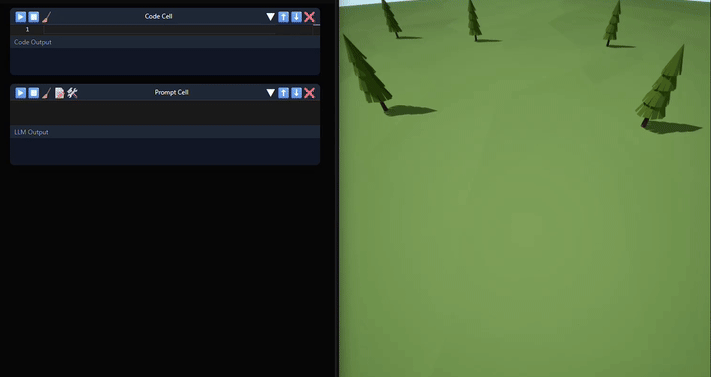
That was before I took Jeremy Howard’s most recent course, “Solve It with Code”. In it he unveiled a new interface for tool development like I’d never seen before, similar to a Jupyter notebook, it allowed coding and note-taking, but also tied LLM interaction and agent deployment into one humble looking interface. An agent could be written, deployed, and working in five minutes, without having to update a single Python or config file. The minute I saw this I asked myself, “Could this strategy be what makes agents viable in production?”
Over the next couple weeks, I set out on a mission. The idea was to build my own notebook interface just like Solve It, but connected directly to an Unreal Kernel. When the dust settled and all of the components were in place, my first agent test, a tool which could spawn a tree, was deployed in minutes. And just like that, the barrier to entry for agent building in Unreal disappeared.
With the foundation laid, I set a new goal for myself: build a simple agentic environment/layout toolset by the end of the week. Within only a couple of hours of vibe coding through the new interface, I already had a basic set of tools that could add objects, move them, and delete them. They each worked in isolated tests, however the next day when I put the whole toolset to use in a more complex scene, chaos erupted. I’d ask to perform an action on a specific group of objects, and it would just apply it to one, or conversely to the whole scene. At one point, a simple request to delete an object led to the whole scene disappearing before my eyes…
In desperation I typed “Why can’t you figure out how to operate on the correct object?” and the LLM surprised me by responding with a list of reasons why it was confused, complaining about specific ambiguities in tools. It didn’t leave much to imagination: it wasn’t at all satisfied with the precision of my JSON schemas (which describe the function inputs), and it was confused about the amount of optional parameters in my functions.
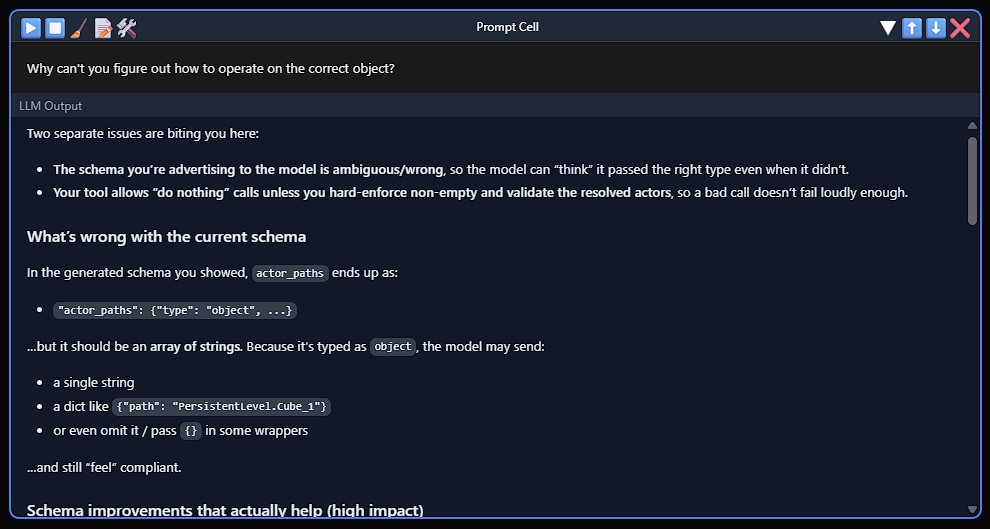
Up to this point, I had been using an auto-schema generator, which worked fine for initial tests, but the LLM showed me it was missing important details, like how to format transform information. These were in my docstrings, but with more to focus on in a large scene, the LLM was leaning much more on the schema than the documentation. This explained why MCP servers need those extra config files, they’re defining schemas separately to get reliable results. Rather than go that route, I decided to craft a way to optionally define explicit schemas on function definition. With that single change, it started nailing the input formatting every time.
%%{init: {'theme': 'dark', 'flowchart': {'rankSpacing': 20, 'padding': 10}, 'themeVariables': { 'primaryColor': '#1e1e1e', 'primaryTextColor': '#d4d4d4', 'primaryBorderColor': '#3c3c3c', 'lineColor': '#808080', 'secondaryColor': '#252526', 'tertiaryColor': '#2d2d2d'}}}%%


graph TB
    badTitle[Simple Schema]:::titleNode

    subgraph bad[" "]
        direction LR
        B1[actor_transform_updates] -->|array| B2(items: object)
        B2 --> B3(no properties defined)
    end

    goodTitle[Descriptive Schema]:::titleNode

    subgraph good[" "]
        direction LR
        G1[actor_transform_updates] -->|array| G2(items: object)
        G2 --> G2C(minItems: 1)
        G2 --> G3[actor_path]
        G2 --> G4[location]
        G3 -->|required| G3T(string)
        G4 -->|required| G4T(array)
        G4T --> G4D("Vector3 [x, y, z]")
        G4T --> G4C(minItems: 3, maxItems: 3)
        G4T --> G4I(items: number)
    end

    badTitle ~~~ bad
    bad ~~~ goodTitle
    goodTitle ~~~ good

    classDef titleNode fill:transparent,stroke:transparent,color:#d4d4d4,font-size:24px

    style B1 fill:#264f78,stroke:#3794ff,color:#d4d4d4
    style B2 fill:#3c3c3c,stroke:#808080,color:#d4d4d4
    style B3 fill:#6c2022,stroke:#f14c4c,color:#d4d4d4

    style G1 fill:#264f78,stroke:#3794ff,color:#d4d4d4
    style G2 fill:#3c3c3c,stroke:#808080,color:#d4d4d4
    style G2C fill:#2d4a2d,stroke:#6a9955,color:#d4d4d4
    style G3 fill:#264f78,stroke:#3794ff,color:#d4d4d4
    style G3T fill:#4d3d1a,stroke:#dcdcaa,color:#d4d4d4
    style G4 fill:#264f78,stroke:#3794ff,color:#d4d4d4
    style G4T fill:#3c3c3c,stroke:#808080,color:#d4d4d4
    style G4D fill:#2d4a2d,stroke:#6a9955,color:#d4d4d4
    style G4C fill:#2d4a2d,stroke:#6a9955,color:#d4d4d4
    style G4I fill:#4d3d1a,stroke:#dcdcaa,color:#d4d4d4

    style bad fill:#1e1e1e,stroke:#3c3c3c,color:#d4d4d4
    style good fill:#1e1e1e,stroke:#3c3c3c,color:#d4d4d4
But it wasn’t done. Next it pointed out confusion over one parameter which all my functions shared: the option to operate on every object in the scene. At first I’d thought that more options would make each tool more versatile, but in practice, this exact feature was what led to my scene being deleted. So I removed this, and other dubious input options, and the complaints stopped. Within a couple hours, a couple of cartoonishly overcomplicated Swiss army knives had become a clean set of single-purpose blades.
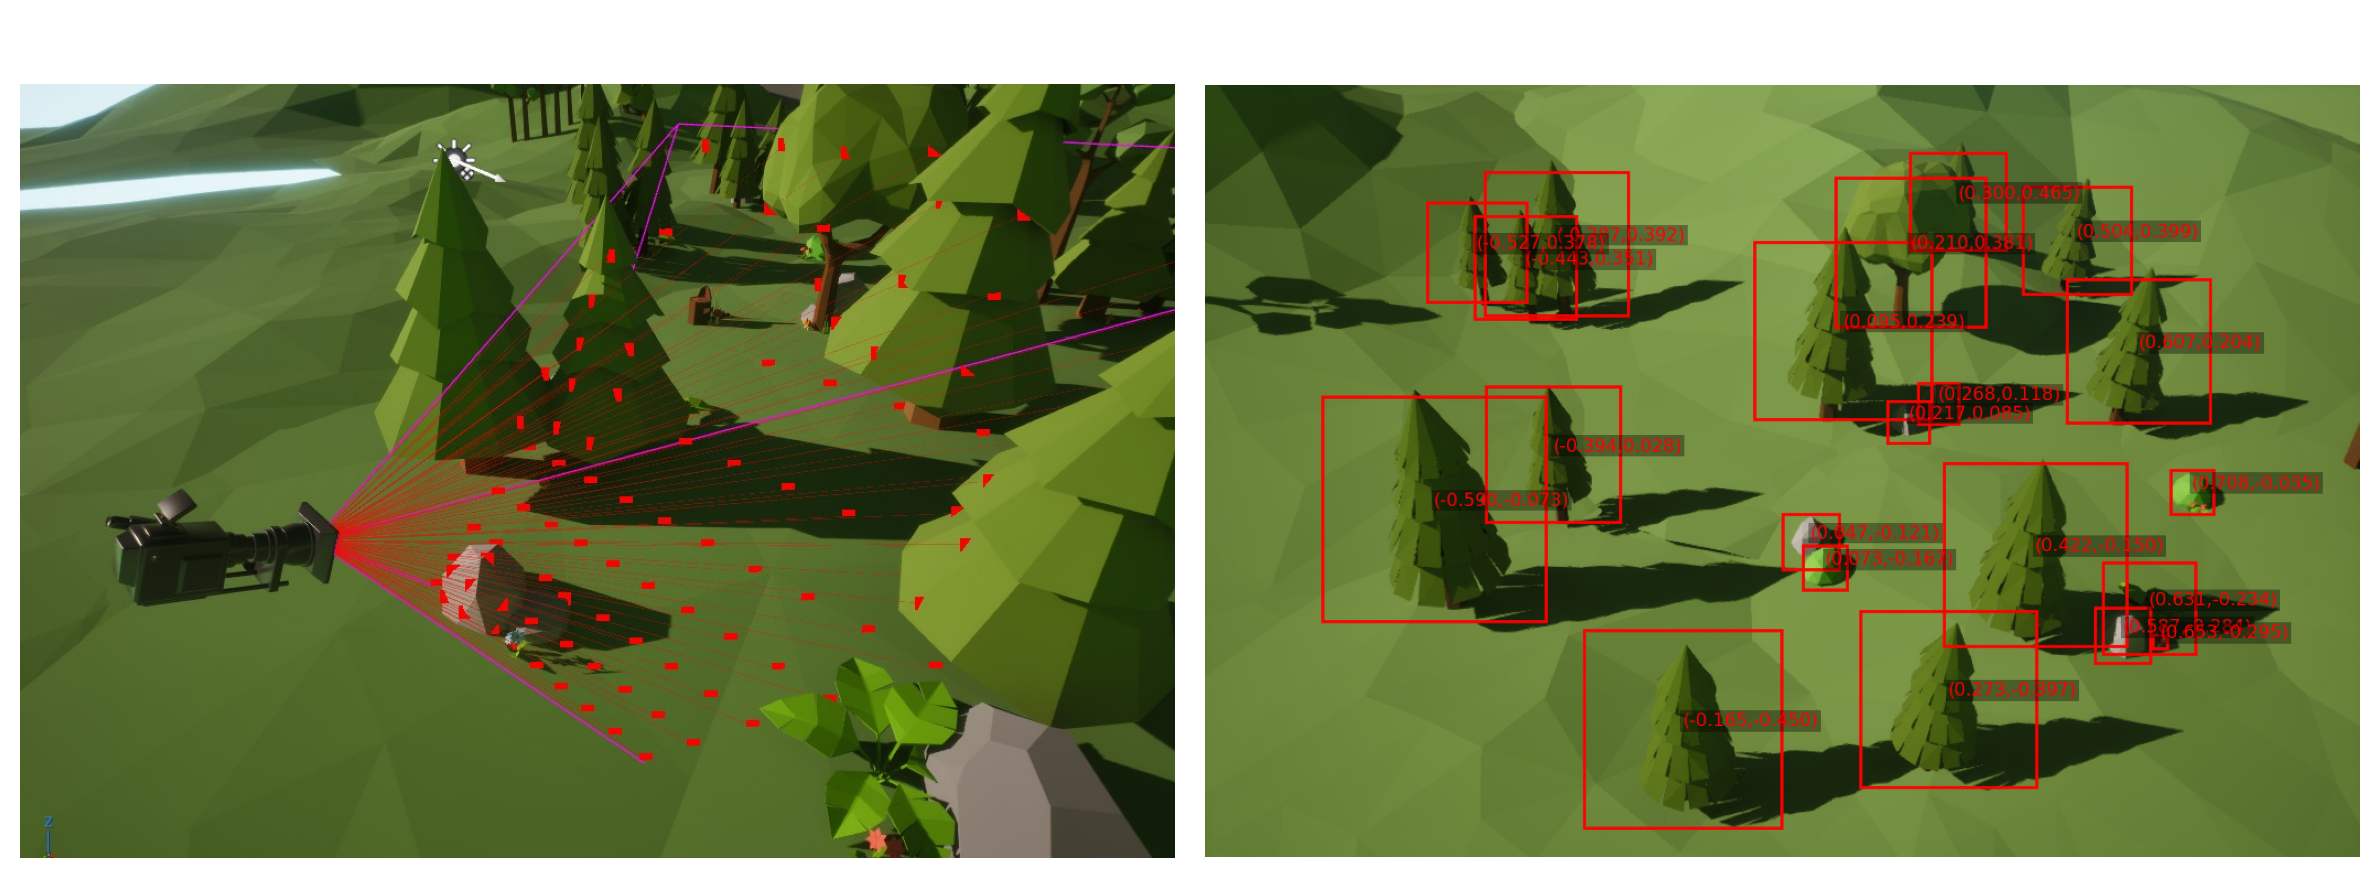
At this point the toolset was working, but something still felt off. Every request required explicit object names, “move Cube_17, delete Sphere_3”, and the user would have to define coordinates for new object creation. To me this really defeated the purpose, because once you have clicked around in the scene to get that information, you might as well have completed the action on your own. For the agent to feel natural, I wanted it to understand what was in front of the viewport camera.
Previously I had built some numpy tools which I thought might fill the void: one for frustum culling that could convert object coordinates into screenspace, and another for ray intersection that could build a depth map from the camera’s view. Repurposing took a bit of back and forth, but by the end of the day, the LLM was able to reason like we do about the contents of the viewport.
With this final element in place, a fog lifted. The interaction I’d imagined just days before was happening before me. Adding, moving, and deleting actors, all with an understanding of what was visible to the user. With the patterns now clear, bonus tools for collision detection and randomization fell into place with ease.
The toolset I’ve built here is far from production ready; it’s a proof of concept. Your production’s needs are unique, and each department’s requirements will differ (and change every week). But by having a method to experiment and iterate without hesitation, you should be able to confidently discover what works at a rapid pace.
With this strategy, I can imagine junior TDs or even technical artists, both testing and deploying agentic toolsets without the help of senior technical staff, using their artistic instincts to envision tools no pipeline TD would have thought to build. For anyone working in production, or any pipeline where tools live and die by the week, I hope this approach will make agents practical for you.
-NeuralVFX
